Showing posts with label upcycle project. Show all posts

Tuesday, March 12, 2013

one way to jazz up old chambray

Hello friends,
Have you ever felt like you have a full closet but nothing to wear?. Yes, I heard ya :). I'm thinking, instead of buying more clothes I won't be wearing any time soon, why don't I re-fashion some of them?. I've got an old chambray shirt from a geology field trip in Utah, several years back. It seriously needs some face-lift :). Been wanting to jazz up old clothes for several months now and last night, I just patched up that old shirt for a start. What fun!.


It started out like this;

Laid a piece of denim patch on the spot I like to cover up.

Layered on top of it, a piece of peach colored tulle. Very much inspired by my 'inspiration sheer' post.

And a little lace goes a long way :).

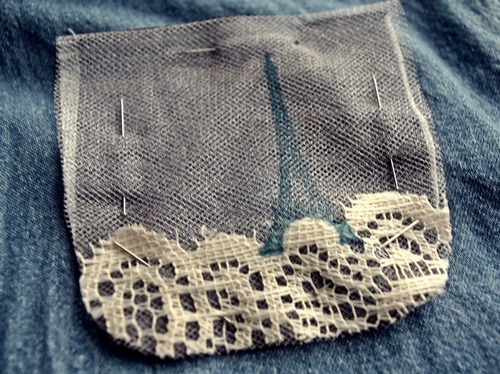
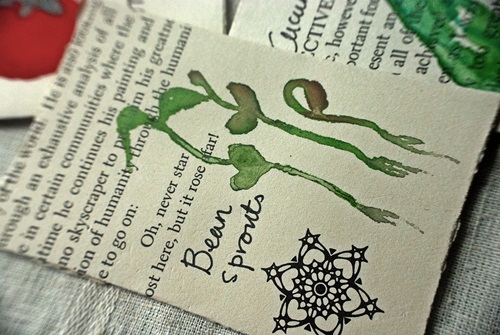
I stamped 'Eiffel Tower' on the pocket, with intention to sew some beads on it.

Then I temporarily removed this pocket patch from the shirt and started sewing the beads, the lace and all the other details on the loose pocket. Much easier this way. When all is done, only then I sewed the embellished pocket to the shirt, for good. Faux pocket that is, because I sewed all four corners to totally cover the old embroidery :). 

The finished patch.

What do you think?. Happy dance :).

LOVE this quick trick. Paris-street-chic, don't you think?.

Poor collars, they need to be pretty too!. So I sewed tiny beads all over the collars :). Inspired by a clever idea I saw on Pinterest, here. Turning an average collared shirt into a fashion statement.

Something old and something blue!.

I spent about 20 minutes to sew all these tiny beads.

Oh, Hello!.  Me, wearing the 'new chambray' while visiting the National Planetarium today :). 

This is so much fun, felt like a designer already :). HA! Maybe I should patch, rip, bleach, die and stamp my other old jeans now. Endless possibilities!. Do you have any cool techniques to revamp old clothes?. Do share :). Until next, have a great mending week!. HUGS.

P/S: I'm linking up this altered project to Eclectic Paperie blog's, the latest Get Altered Challenge : Fabric Challenge.

Friday, March 8, 2013

hanky seed pockets

Sweet friends,
With Spring coming up so soon, may I influence you into a little gardening? :). Well, the fact that I live in a warm country I have more reasons to do so, am I ?. [Taking some baby steps here :)].


A few months back, I found these floral handkerchiefs at a local chinese store. I love vintage hankies but they are hard to come by. These ones are just as cool to make fabric journals or even simple curtains. Nothing too precious :). Today, I'm sharing a fun, easy, early Spring project with you ... seed pockets made of handkerchiefs and old book pages!. Perfect as gifts or to simply amuse yourself :).

I love the naive flower prints on them.

I used three pieces of hankies for making the seed pocket pouch. I simply folded them into half and then another half to create folders/inserts.


Stacked a few and sewed in the middle. Patched up scrap fabrics, laces, buttons and ribbons on the pockets. I used elastic string & a large button for closure. Lastly, decorated the covers with silk roses, ribbons and tiny beads.


The complete project, measures 4.5" X 5".

Sweet hankies, LOVE the scallop edging stitches!.


The back.

I sewed tiny beads all over the back cover.


some at the spine.

and on the front cover.


More stitches for this gardening pouch.


The most fun part is adding the details on these pockets!.


Playing with soft green, yellow and orange colors for a change.


And the fun doesn't stop there. I made pockets for the seeds from old book pages and drew botanical illustrations on them. You could opt this out and use magazine images instead :).

Old book pages seed pockets, before being painted on.


Pockets with fun drawings on them.


My grandmother used to keep her vegetable seeds in folded, old newspapers. She and grandpa grew all the veges and fruits for our home cooking in the backyard. I used to help water her plants as a kid, and making these pockets brought back fond memories :).


I got all excited and felt a need to have another small treasure in our pockets. So I made garden markers from ice-cream sticks :). They don't bear the plants' botanical names but some powerful words for the plants. I first primed the sticks with gesso, then painted with green acrylic and stamped sweet words. 

Ice-cream sticks are great for garden stakes/markers.


Hopefully my plants grow happily next to their new toys :).

Will my cactus bloom now?. Oh, ones certainly could hope :).

Okay, that's all I have today. I'm off now to buy some seeds to fill up these pockets. Ha!. If you decided to spend some time in the garden soon, do share your potting projects or planting. If it's not snowing, of course :). Wishing you, Happy Earth Day in advance!. HUGS.

Thursday, February 14, 2013

rags to riches

Hello friends, 
Happy Valentine's Day!:).
I talked about making a collage journal and last night, I made one :). [Hmmm, Valentine's themed journal?]. I finally used up some of the brown paper bags I've been keeping all these years. Good riddance!:).


I glued to the cover an old lace and sewed a few silk flowers.


The back cover. 

At the back, I sewed a piece of paper with tiny metal hooks.

This is a raw journal, crumpled and ripped so to speak. Lately, I LOVE the rawness of things. Back to basics. The rougher, the better. Thus, I would try add splash of bright colors to cheer up the otherwise, blend projects. For instance, I simply made a ribbon by tearing up a piece of old pillow case. Cheap & good :).

Fabric torn-ribbon.

I started out by cutting three small paper bags into several pieces of 7" X 10" pages. Crumpled and wet them in water, and hung to dry in the sun for one afternoon. LOVE, LOVE these crisp sun-dried papers!. Once dry, ironed them to help flatten the pages a little bit. 


Sun-dried paper bags. They do look much like tobacco leaves!.


Then hand-sewed the paper stack, right in the middle. Decorated the cover with lace & silk flowers. [still very much influenced by the festive mood of CNY around here]. Lastly, I stapled a pink torn-fabric ribbon on the spine for closure. Done :).


My first collage in the journal. 

I guess you could do the same with old magazines, cereal boxes, used gift wrappers and old calendars. Putting together this journal is so quick, since I'd prepared the papers early on. Have fun up-cycling!. HUGS.

Saturday, February 9, 2013

faux glass sun catcher!

Sweet friends,
I woke up this morning to a beautiful, sunny day. Makes me happy since it has been gloomy and wet these past few days. I'm sending warmth and comfort to everyone out there, who patiently braving the coming winter storm [especially to you, Linda Kunsman :)].

I made a simple sun catcher last night, from leftovers of the transparent-book project. I'm too happy that I can set it out on the bedroom's window today :).


I LOVE the woods behind my apartment. I'm lucky to have the living room and the bedroom facing the woods. I usually open the living room's windows wide, get down on my yoga mat and do my practice facing these woods. Yes, with birds singing their hearts out :). The best outdoor yoga I could have without living home!.

The view at noon today. Beautiful day out, isn't it?.

I 'trapped' little silk flowers in between two pieces of transparencies by stitching around to keep them in place. 


With jewelry making tools, I added glass beads, jump rings and a ring binder to make this very simple faux glass sun catcher. Oh, how I wish I have a garden. Then I could make more elaborate sun catchers or even wind chimes and hang them on trees!. Someday.

Making this is super fun because you could add anything to the assemble. Charms, old bangles, origami cranes, scrap fabrics, old cutlery, beads, feathers ... endless craziness! :). I hope this post leaves you much joy. HUGS.
Related Posts Plugin for WordPress, Blogger...
BACK TO TOP